

NEURONUP SESSIONS
Save time planning your interventions with NeuronUP sessions
Bring together the activities you need, customize the intervention, and organize your patients’ work in just a few minutes. You can create sessions from scratch, reuse existing sessions, or rely on artificial intelligence to prepare a proposal tailored to each profile.
What is a NeuronUP session?
A NeuronUP session is a set of activities organized in advance by the professional to work on one or more intervention goals.
You can select the activities, set their order, modify their parameters, and decide how much time will be spent on each one.
You can also assign the session to one or more patients to work at the center or from home.
Sessions allow you to plan personalized interventions in just a few minutes, reuse the work you have already done, and stay organized more efficiently.
Discover the advantages of creating a session in NeuronUP
In this video, you will learn how to create a digital session, select the activities, adjust their settings, and assign it to your patients.
What can you achieve with NeuronUP sessions?
Save time and keep your interventions organized
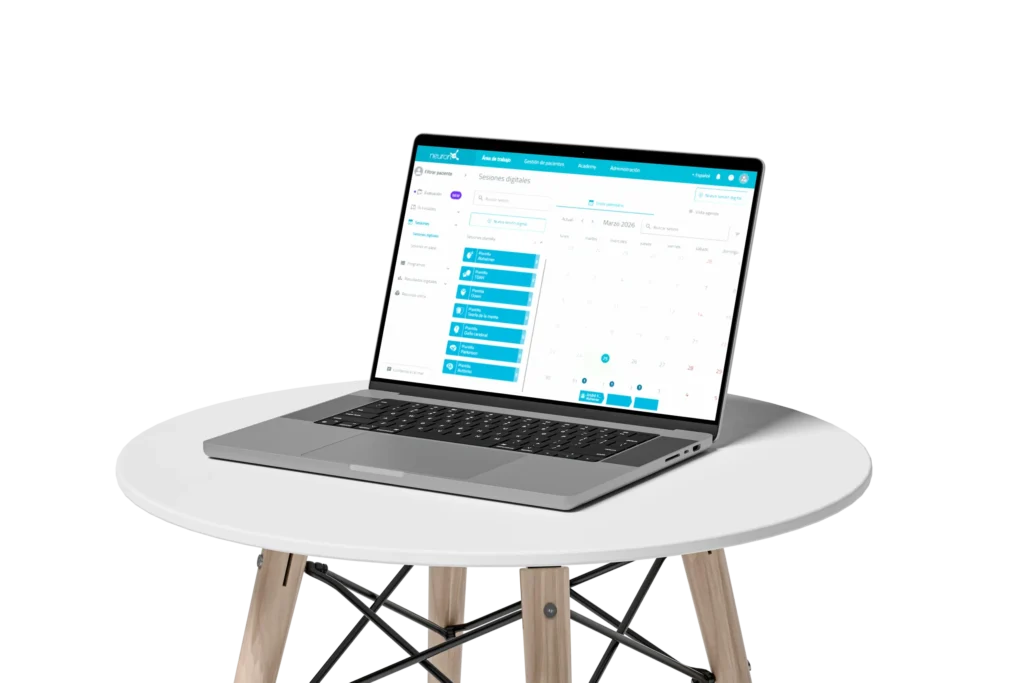
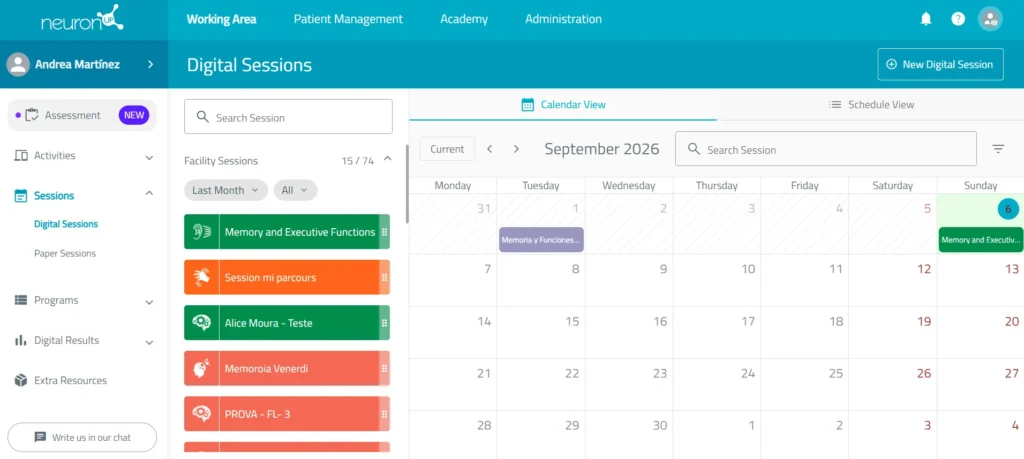
Create sessions in minutes by organizing activities from hundreds of resources so you can save, edit, or reuse them. View your sessions in the calendar or agenda view to keep track of each patient’s assignments and schedule.
Duplicate sessions and reuse the work you have done
Replicate previous sessions, sessions from other patients, or sessions from colleagues at your center without starting from scratch. Modify their activities, order, or parameters to suit the new profile, keeping your planning consistent without altering the original version.
Generate similar sessions
Create automatic alternatives that work on the same cognitive functions but with different exercises. This provides continuity to the goals, adds variety, and avoids repetition, while allowing you to review and adapt each activity before using it.
Design personalized interventions
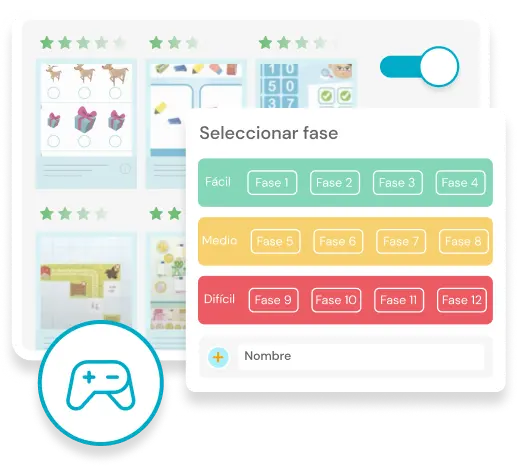
Adapt each session to the patient’s needs, goals, and cognitive profile. Adjust parameters such as working time, starting level, customization, task order, and language to achieve a structured, individual intervention.
Create sessions with artificial intelligence
Generate automatic initial proposals based on the patient’s characteristics. The professional keeps full control to review, add, remove, or adjust parameters and activities according to their own clinical judgment.
Work with several patients at the same time
Assign the same session to multiple patients on different devices so they can progress simultaneously. Each person works at their own pace and starts at the level that matches their performance, with no prior manual adjustments.
Run group sessions
Project activities to be solved together, encouraging motivation, participation, cooperation, turn-taking, and active listening. The professional guides the problem-solving and monitors the group dynamics.
Record results automatically
Each patient’s digital performance is saved automatically and instantly to their profile. This eliminates manual record-keeping and makes it easier to review their history, detect progress, and adjust planning according to their progress.
Discover the advantages of creating
NeuronUP sessions
Sessions allow you to personalize and organize your interventions according to the goals you have for each patient.
Programs allow you to organize a complete intervention lasting several weeks or months, distribute sessions according to the established plan, and track each patient’s progress from a single platform.
How do you create a digital session in NeuronUP?
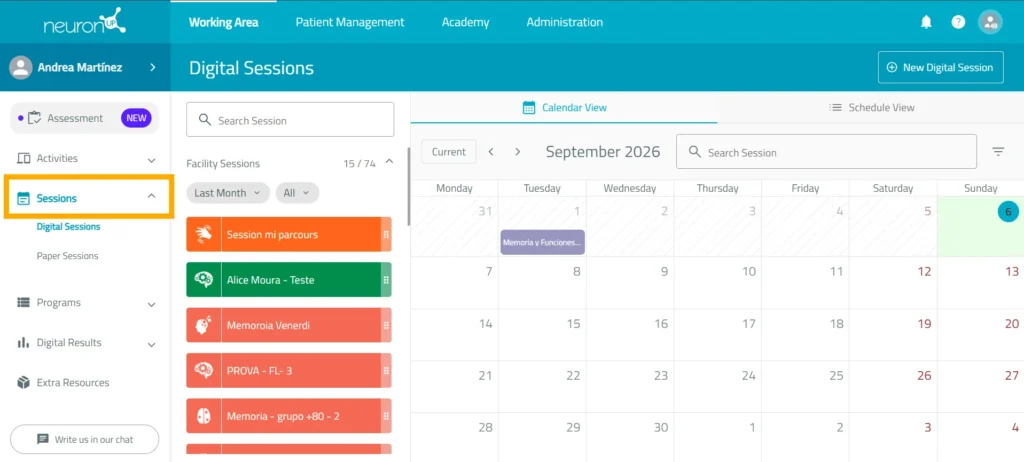
1. Go to “Sessions”
Go to the “Sessions” section and select “Digital sessions” from the menu on the left side of the screen.
From here, you can view the sessions you have created, access recent sessions, and prepare a new intervention.
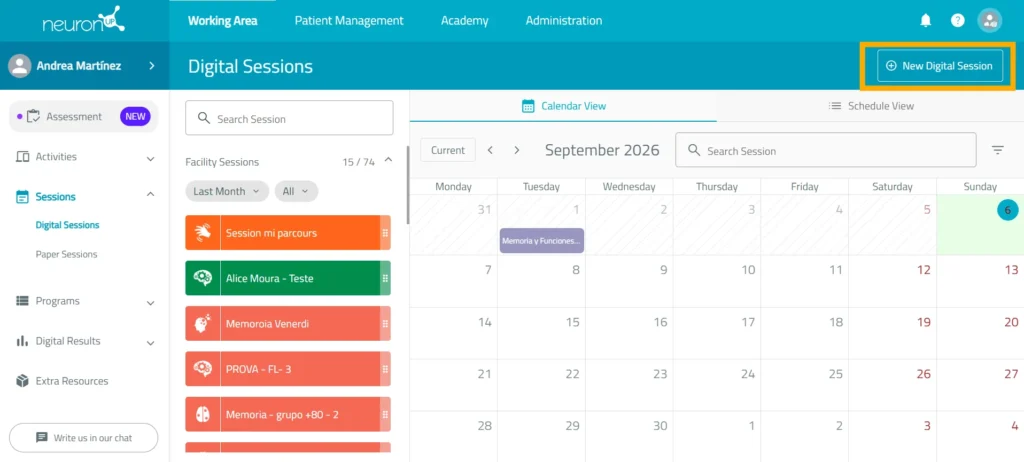
2. Click “New digital session”
Select the “New digital session” option to start creating the session and choose the “Standard session” option.
You can also use an existing session as a starting point, duplicate it, generate a similar session, or create a proposal with AI.
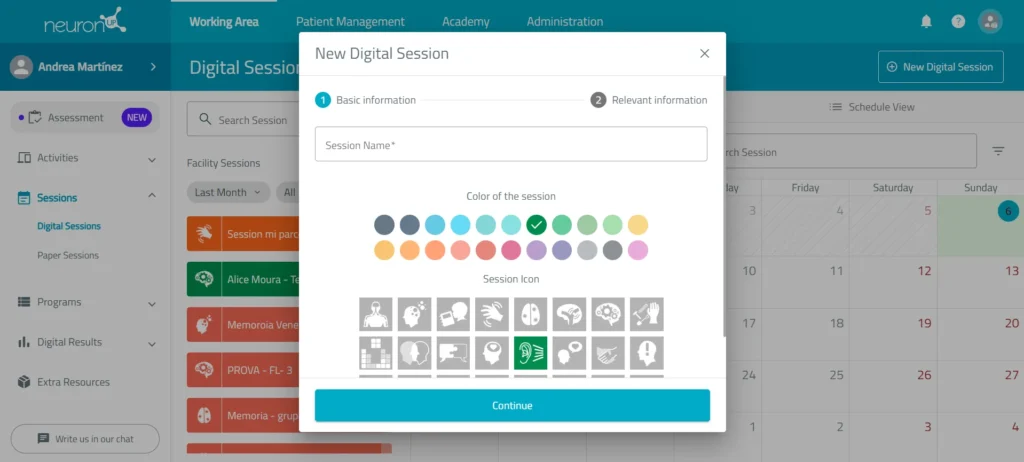
3. Fill in the basic information
Enter the details that will help you identify and organize the session:
- Type the name of the session.
- Select an icon.
- Choose a color.
- Add a description and tags so you can find it easily.
- Click “Create”.
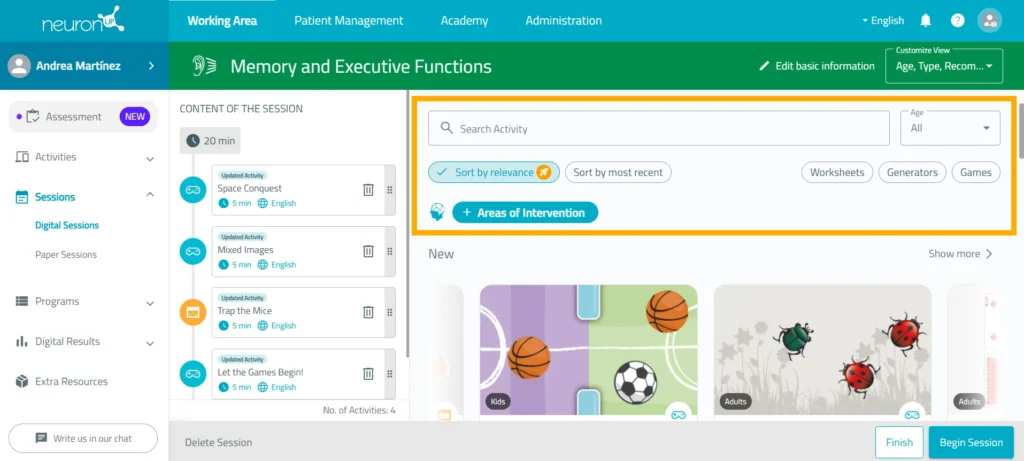
4. Filter and add the activities
Use the filters to find the activities you want to include in the session and click on them to add them.
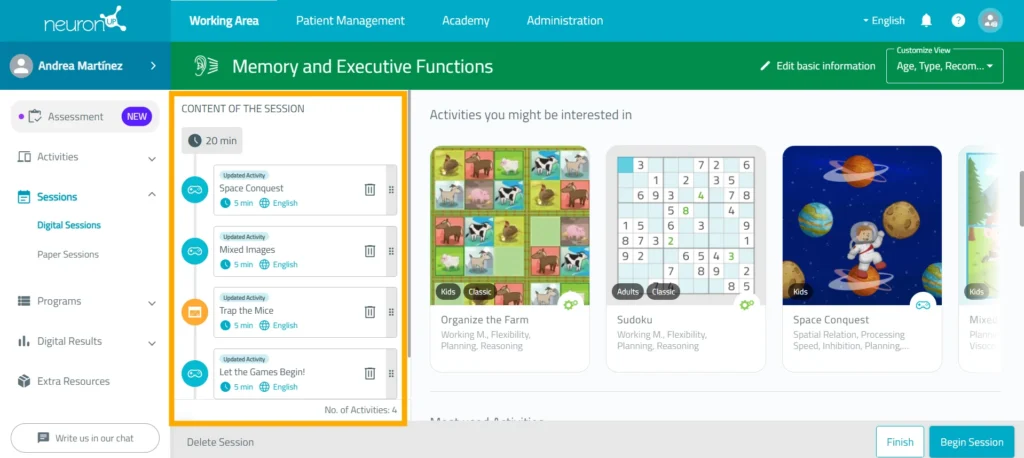
The selected activities will appear in the side panel, and you can add the same activity several times if you need to.
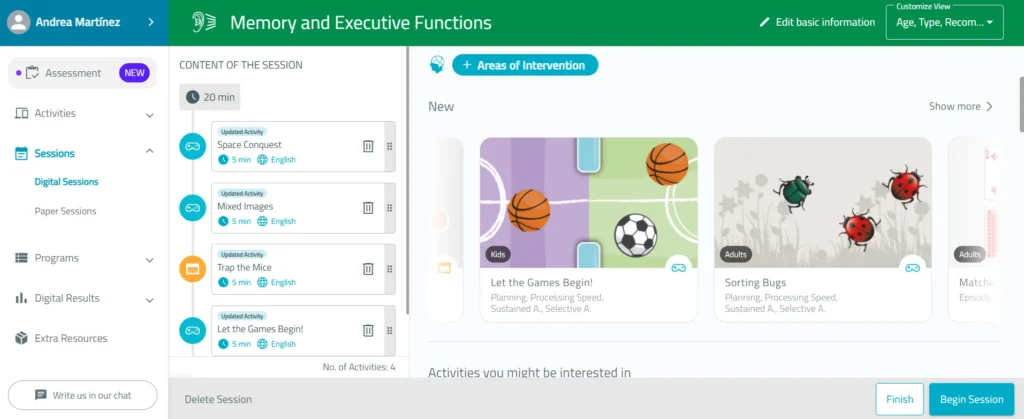
5. Arrange the order of the activities
You can change the order of the exercises to set the work sequence. Simply press and hold the activity and drag it to the desired position.
The order can be changed at any time before finishing the session.
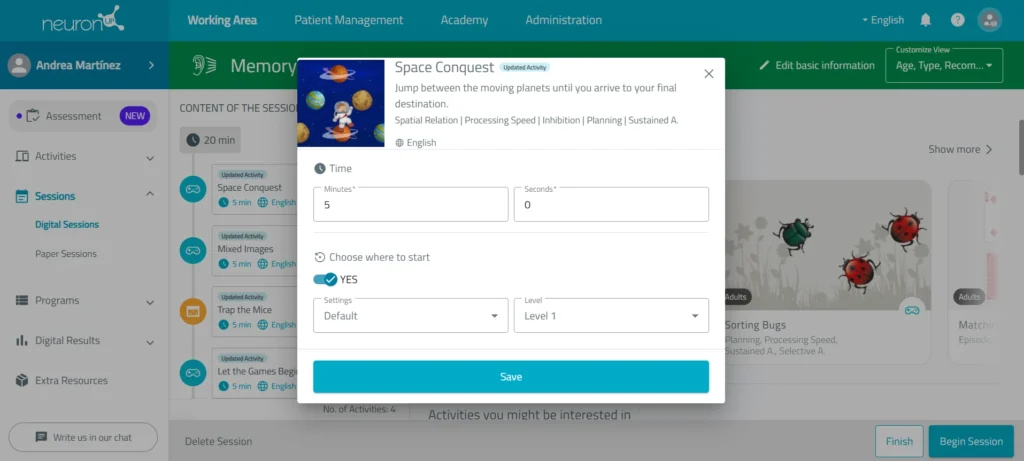
6. Configure the activities
This step is optional.
By default, each activity has a set duration, and patients can start the games from the level where they left off last time. If a patient has never done the activity, they start from the initial level.
You can click on each activity to modify the activity duration, starting phase, and settings of each activity.
7. Review and edit the proposal
If you used AI, review the proposal before using it.
You can:
- Add activities.
- Remove activities.
- Replace exercises.
- Change their order.
- Modify the time.
- Adjust the level.
- Select other customization options.
This way, the final session is always subject to the professional’s judgment.
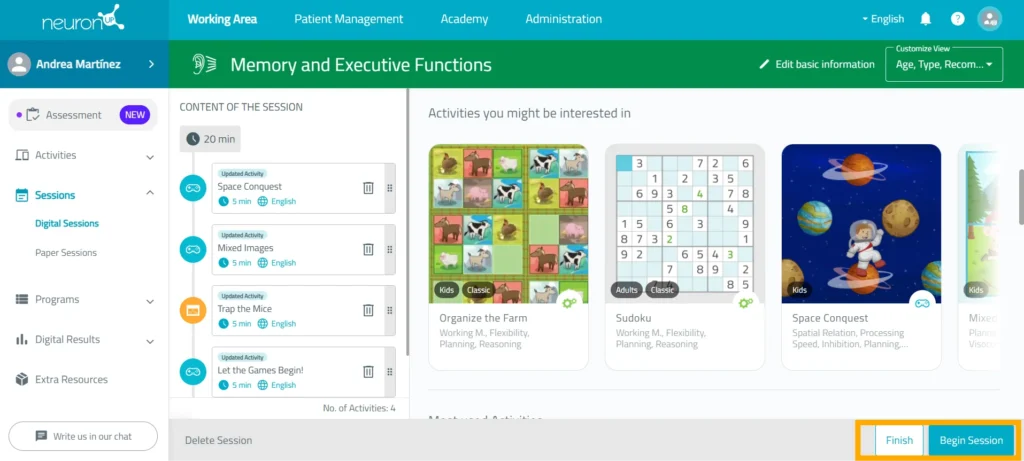
8. Save the session
When you have finished, click “Finish” at the bottom right of the screen to save the session. If you want to start working with it right away, click “Start session”.
The session will be saved in your list of sessions, and you can edit, duplicate, or assign it whenever you need to.
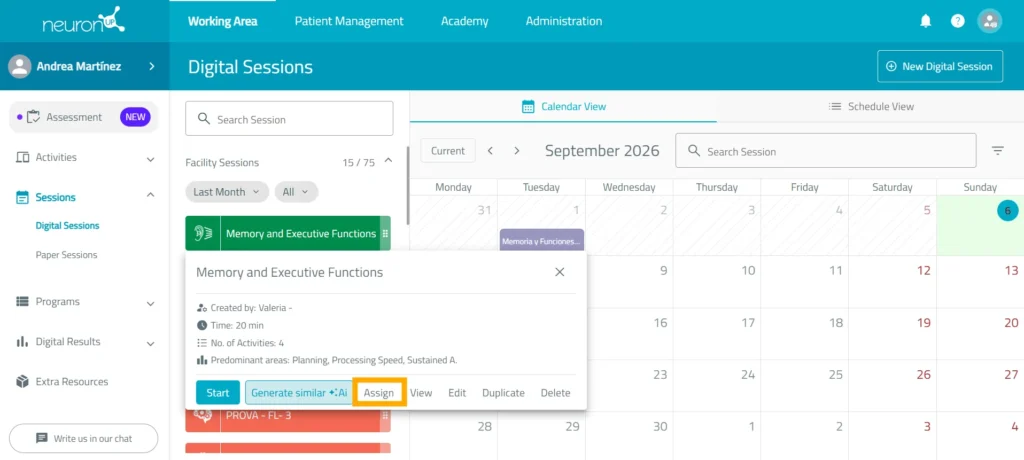
9. Assign the session and configure its behavior
You can select one or more patients to assign the session to.
Next:
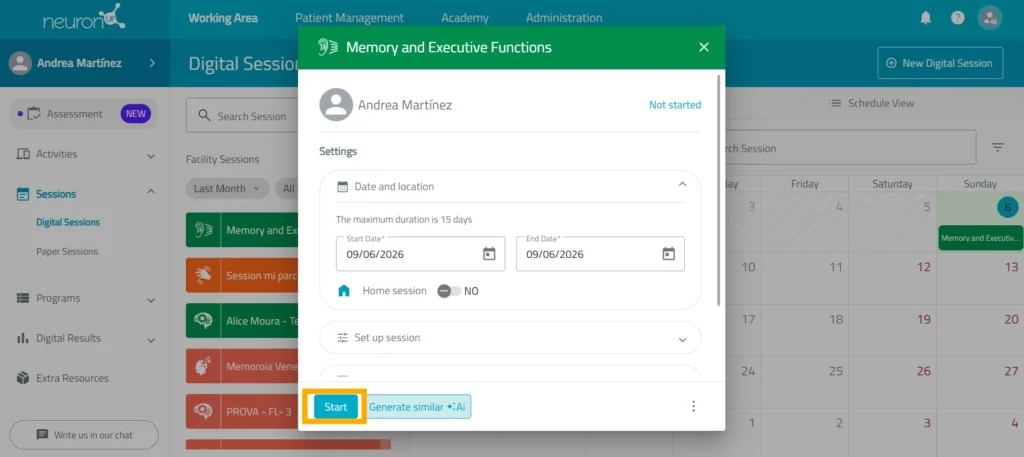
- Set the start date.
- Set the end date.
- Turn on the home session option when you want it to be done remotely.
- Configure the session behavior (supervised session, patient evaluation, confirm end of activity, and continue button).
- Leave a message for your patients to read when they start the session (optional).
Once configured, you will find it in the calendar.
10. Start the session
Click “Start” to begin.
If the session has not been assigned beforehand, it will automatically be linked to the day it is started.
11. Check how the session is going
Once started, you can follow its progress using the indicator available on the platform.
You can also view and organize your planning from the calendar view or the agenda view.
Learn more about
NeuronUP


Frequently asked questions
Can I use a session created by another professional?
Yes. You can use sessions created by other professionals at your center.
If you need to adapt them, you can duplicate them and edit the copy to modify the activities, their settings, or the order of the session.
Do the activities in a session adjust their difficulty automatically?
Yes. The activities included in sessions can automatically move up or down a level depending on the patient’s performance.
This way, each person can work at a difficulty level adjusted to their progress.
Can I adapt sessions created with artificial intelligence?
Yes. AI sessions are generated automatically based on the patient’s profile, but the professional keeps control over the intervention.
You can edit the suggested activities, modify their duration, change the order, and adjust the number of activities included in the session before using it.
In the following video, we show you how to do it step by step: https://youtu.be/hLDHwatIYgo
Can I send a session for patients to do at home?
Yes. With NeuronUP2GO, you can assign sessions for the patient to complete remotely during the dates you set.
In addition, the professional and the patient can exchange messages within the sessions to stay in touch, answer questions, and share instructions while working from home.
In the following video, we show you how to create and assign a session for remote work: https://youtu.be/VYdZN9onh0c
How can I assign a session?
You can assign a session in two ways:
- From the calendar: drag the session to the day you want to do it. Once it is on the calendar, select the patient you want to assign it to.
- From the session itself: click on the session and select “Assign”. Then choose one or more patients.