Time with your patients is limited, so why waste it searching, creating and gathering materials, and why not invest it directly in the intervention with your patients? Work with NeuronUP sessions to save time and improve your organization.
What is a NeuronUP session?
A session is a set of activities. The creation of sessions allows you to
plan your work in a few minutes and design a customized intervention. Below, we help you discover how to make the most of sessions.
Advantages of working with NeuronUP sessions
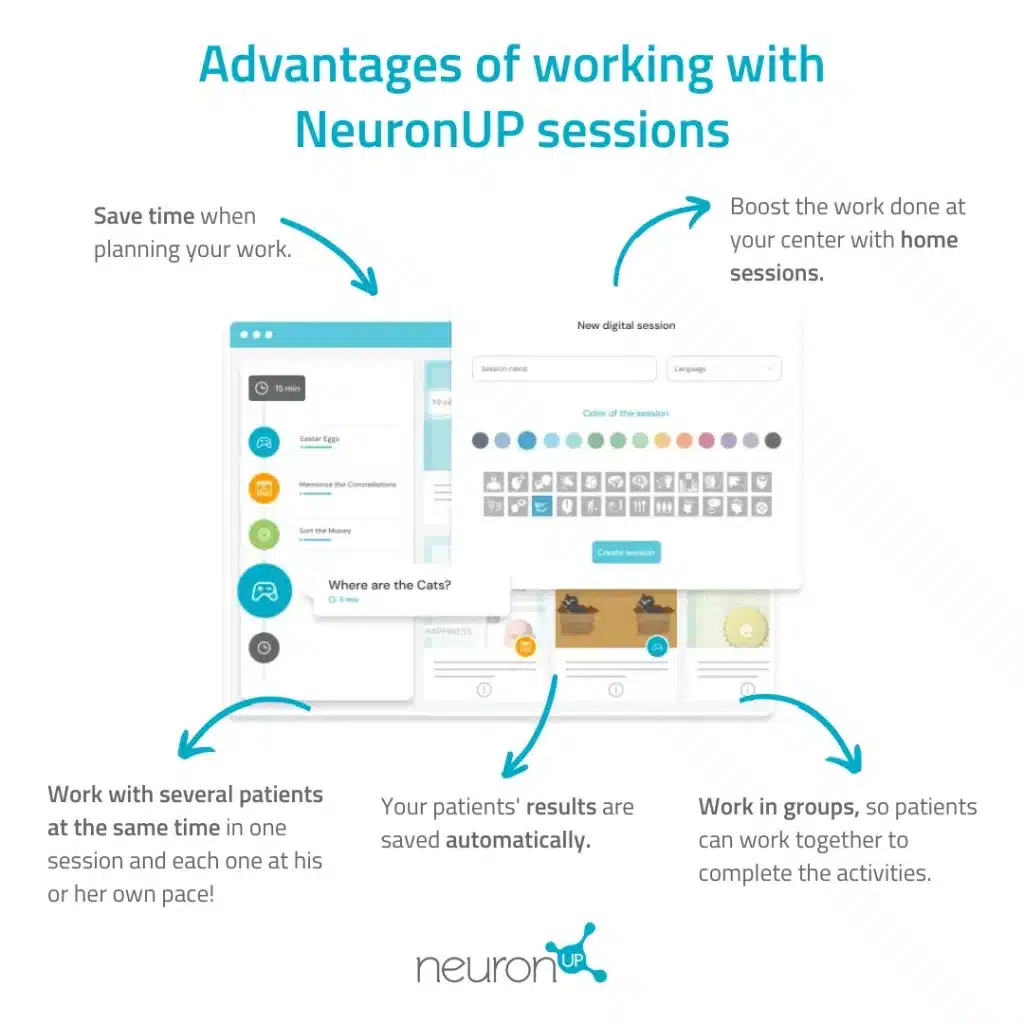
- Save time when planning your work.
- Design a customized intervention.
- Work with several patients at the same time in one session and each one at his or her own pace!
- Work in groups, so that the patients can work together to solve the activities.
- Enhance the work done in your center with sessions at home.
- The results of your patients are automatically recorded.
1. Save time
NeuronUP sessions allow you to design in just a few minutes a flexible intervention with hundreds of activities that adjust to the needs of each patient.
2. Work with several patients at the same time.
Did you know that with NeuronUP you can have your patients working on different devices at the same time in the same session?
This feature will allow you to save time and, in addition, you will not have to worry about regulating the level of each of these users, the platform regulates the activities of the session to the level of each user!
That is to say, if the last time Juan played a game he finished at level 2, in this new session he will start at that level; while if Carmen reached level 6 the last time she played she will automatically start at that stage. Everyone will go at their own pace and you will not invest a single second in adjusting it!

3. Work in groups
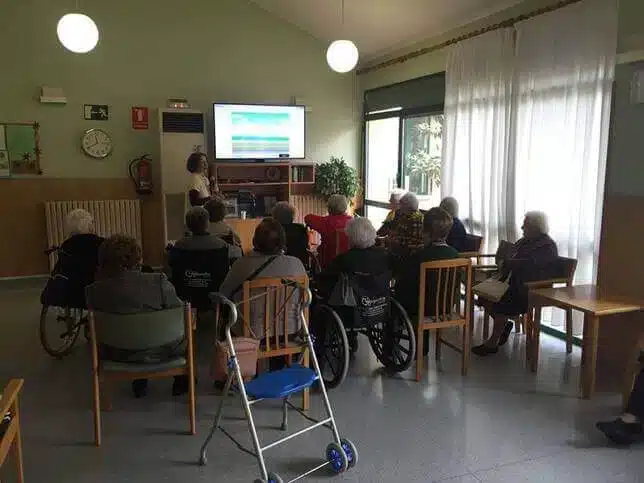
And did you know that with NeuronUP, in addition to working individually, you can also work in group sessions? Some centers, especially associations, work with groups where the patients solve the different activities of the platform together.
Advantages of working in a group
- Motivation is greatly increased.
- The patients learn from each other how to perform the task.
- Social skills are worked on (respecting the turn to speak, listening, helping if necessary…).
Learn more about
NeuronUP
Try it for free
The platform that 3,500+ professionals use on a daily basis
4. Enhance the work done at your center with sessions at home.
With NeuronUP, in addition to working at your center with your patients, you can create sessions for your patients to perform from the comfort of their own home.
You can create telerehabilitation sessions to enhance the work done in your center, avoid interruption of therapy during vacations or illnesses and facilitate the intervention for people with travel difficulties.

5. The results of your patients are automatically recorded.
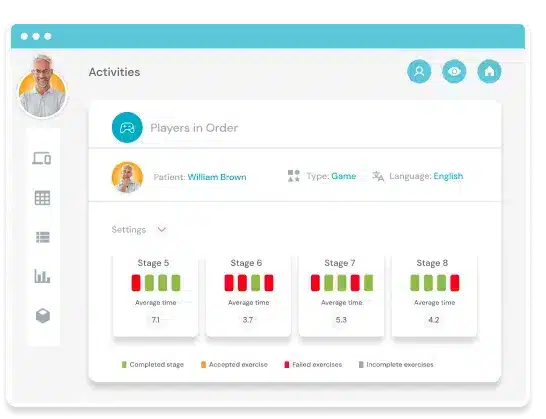
Every time one of your patients performs a NeuronUP activity or session, the results are automatically saved in their profile.
This feature allows you to redefine the therapy according to the progress of each patient, promoting a continuous and scheduled improvement.
How do I work with a NeuronUP session?
Here is a step-by-step explanation of how to work with a NeuronUP session:
1. Select “Digital sessions”
To start, click on “Sessions” and then on “Digital Sessions” on the left side of the screen.
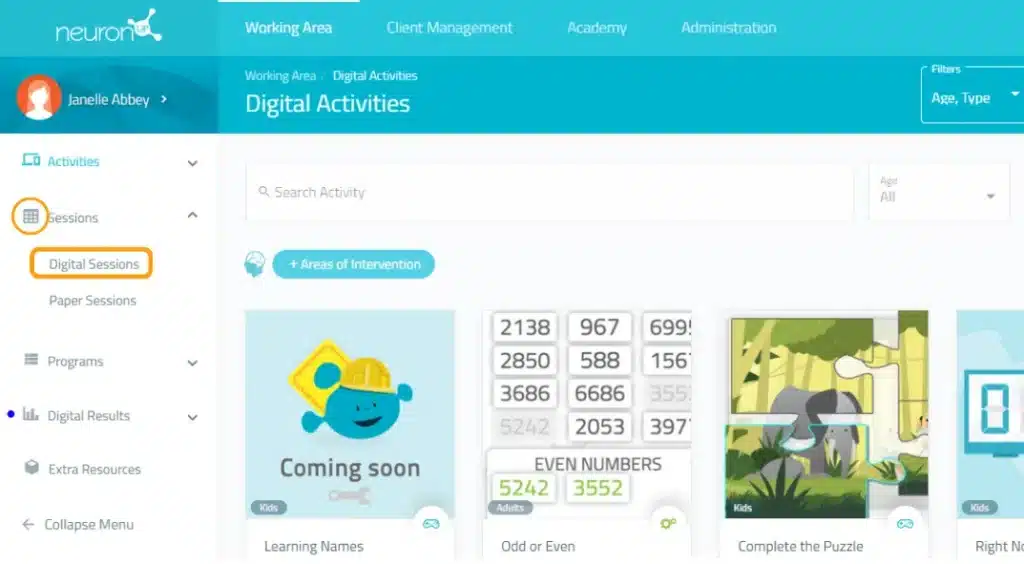
2. Click on “New digital session”.
Once you have clicked on “New digital session”, the following window will appear:
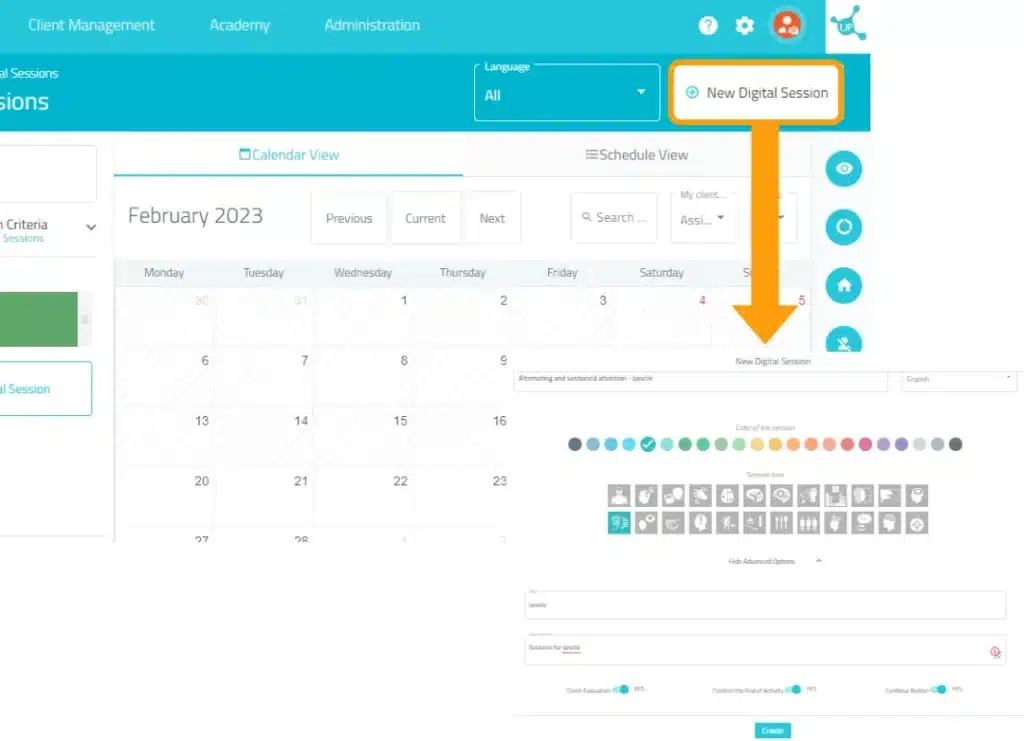
3. Fill in the basic session information
- Name your session.
- Choose an icon and a color.
- Click on “Advanced options” (optional):
- Add tags: this will help you find your session more easily.
- Add a description of the session.
- Enable or disable advanced actions.
- Click on “Create”.
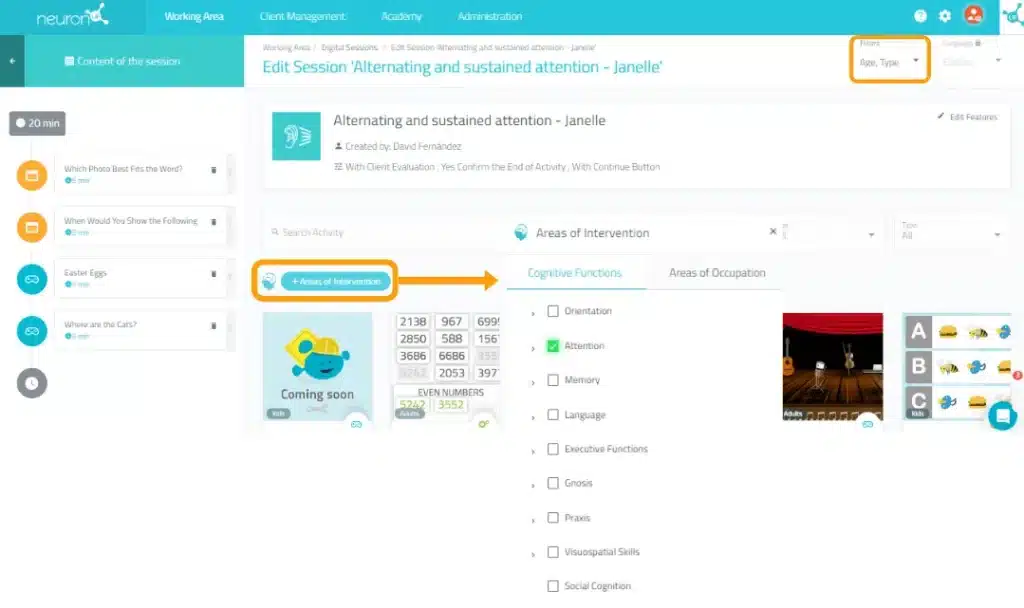
4. Filter the activities
The basis of the session is created, now you have to add the activities you want.
To do this, you can filter the activities by cognitive functions, by type of activity (generator, worksheet or game) or by age.

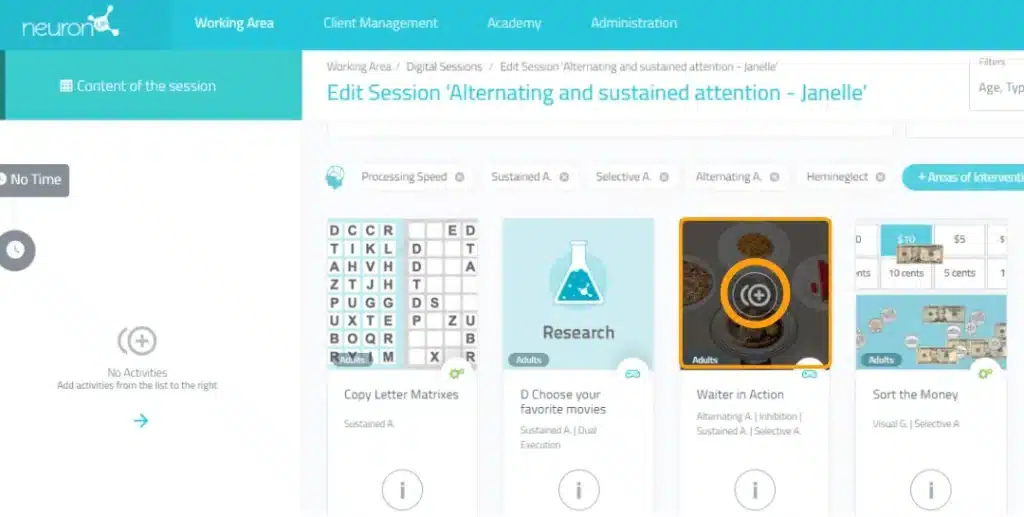
5. Choose the activities
Once you have filtered the activities, just click on the ones you want to add to your session. The selected activities will appear on the left side of the screen as you add them.
Note that, if you want, it is possible to add the same activity several times.
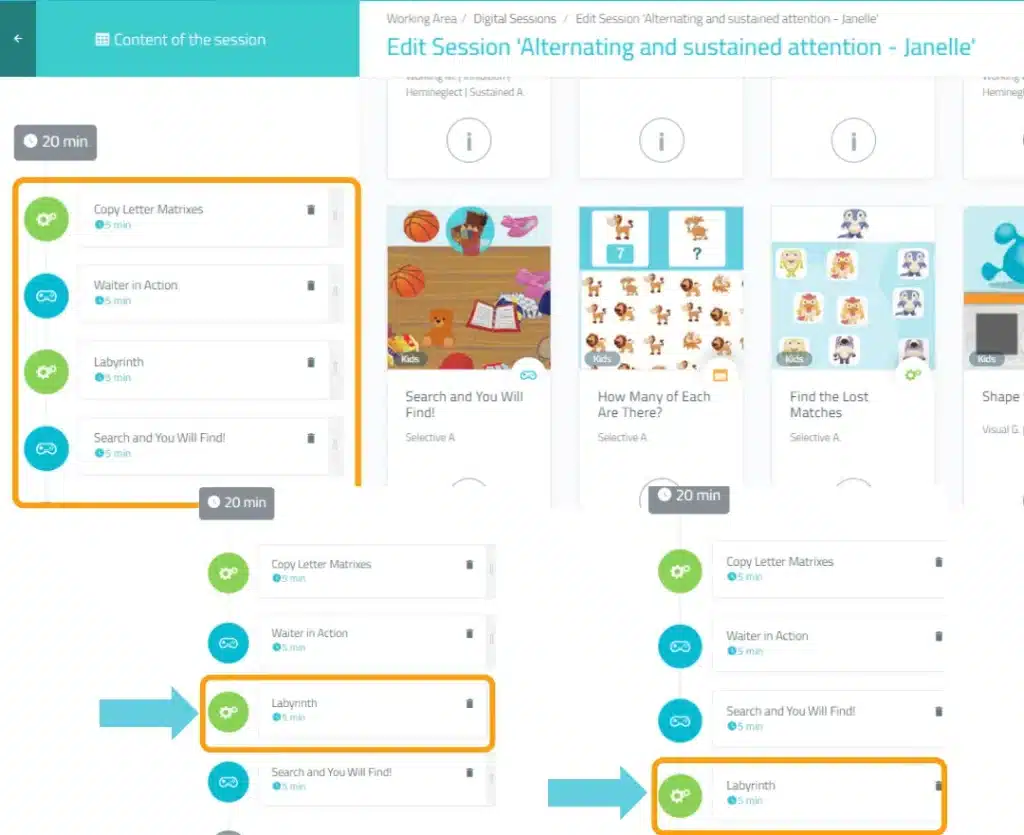
Change the order of activities (optional)
You can change the order of the activities. Just hold down the activity and move it to the desired place. In the example on the right, we have moved the Acts by numbers activity from the third place to the last place.
6. Configure the activities (optional)
By default, each activity will last 5 minutes and the patient will start at the level at which he/she last stopped, or at the lowest level if he/she has never worked with the activity in question.
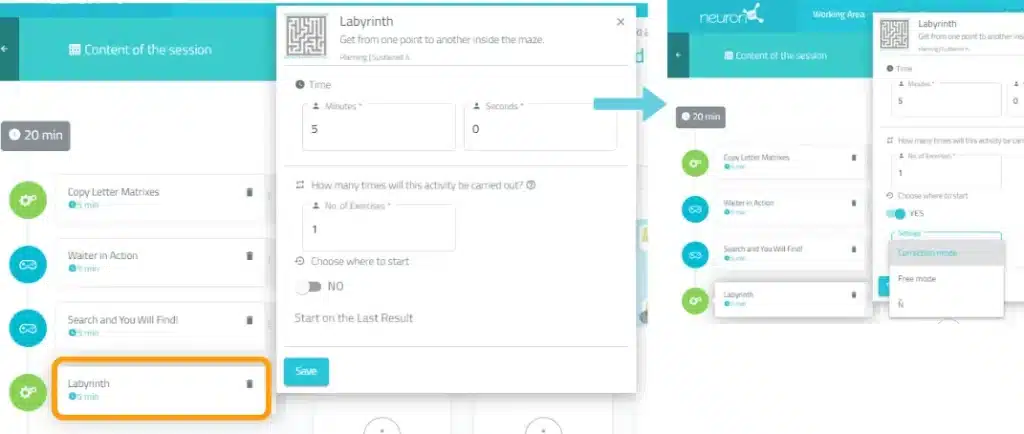
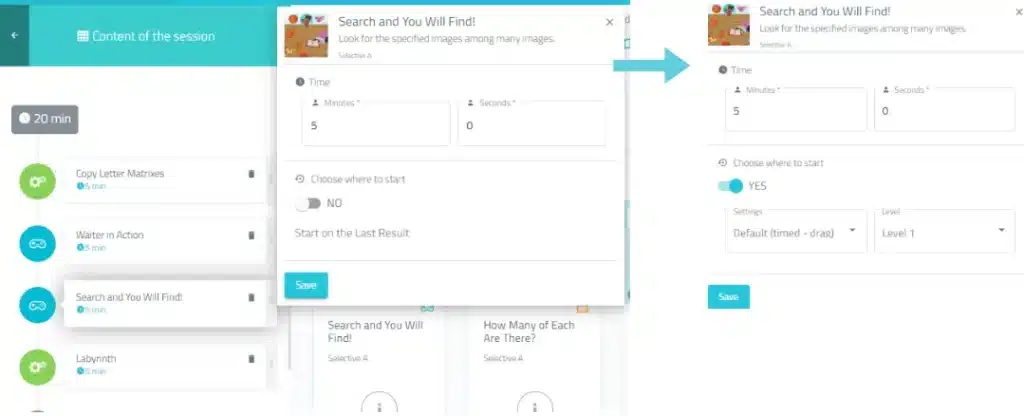
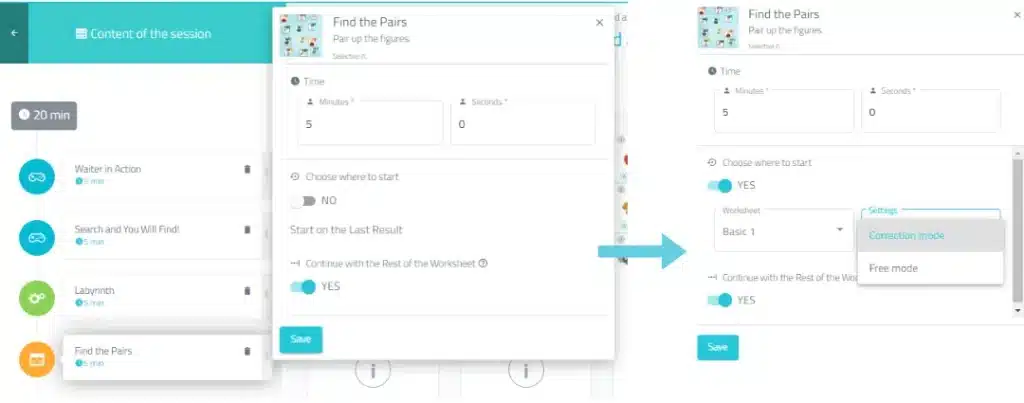
To configure these settings, simply click on each activity and change the settings, as shown below:
Configuring a generator in a session
In a generator you can define:
- The time of work,
- adapt the number of repetitions,
- select the customization previously created in the activities section.
Configuring a game in a session
In a game you can define:
- The working time,
- choose the level at which the patient starts.
- select the custom phase previously created in the activities section.
Configuring a worksheet in a session
In a worksheet you can define:
- The working time,
- choose the level at which the patient starts.
- choose, if after completing the first worksheet, continue with the rest of the worksheets.
7. Save session
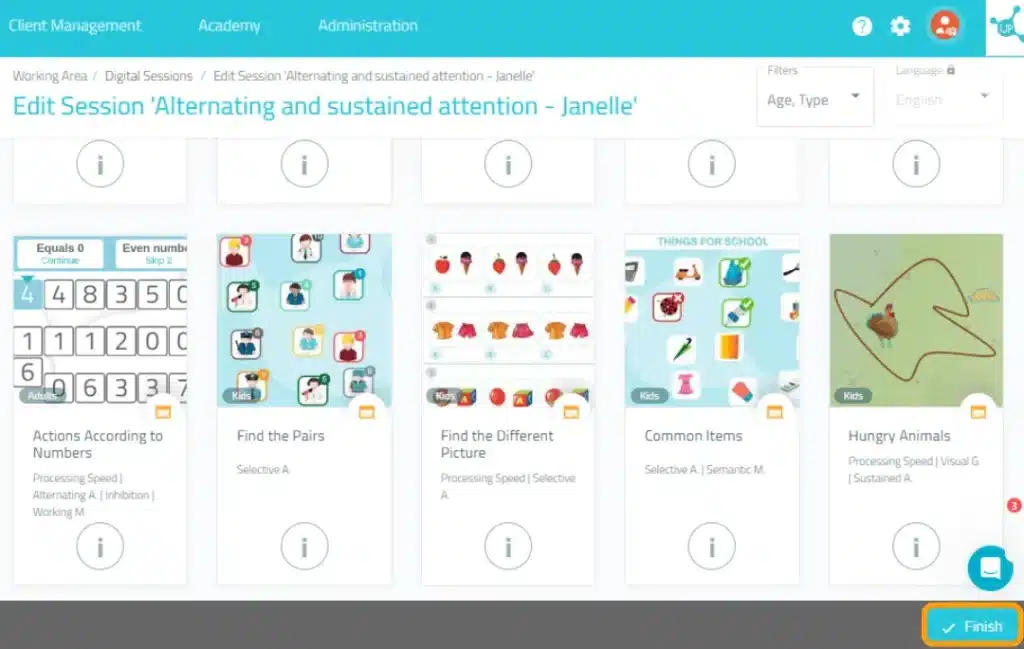
Once the session is set up, click on “Finish” at the bottom right to save the session.
the session. You can modify it later if necessary.
8. Assign session (optional)
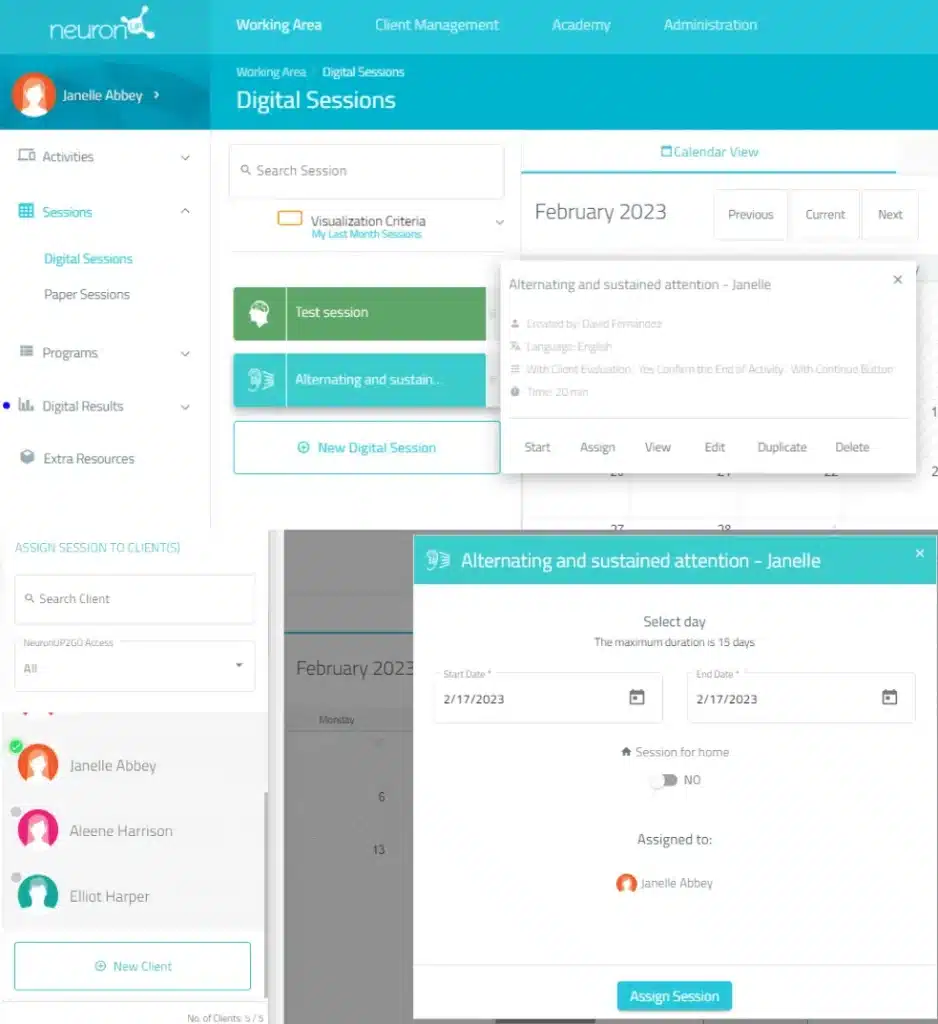
- Select one or more patients to assign the session to.
- define the start and end date of the session,
- activate the home session filter if you want your patient to work remotely.
9. Start session
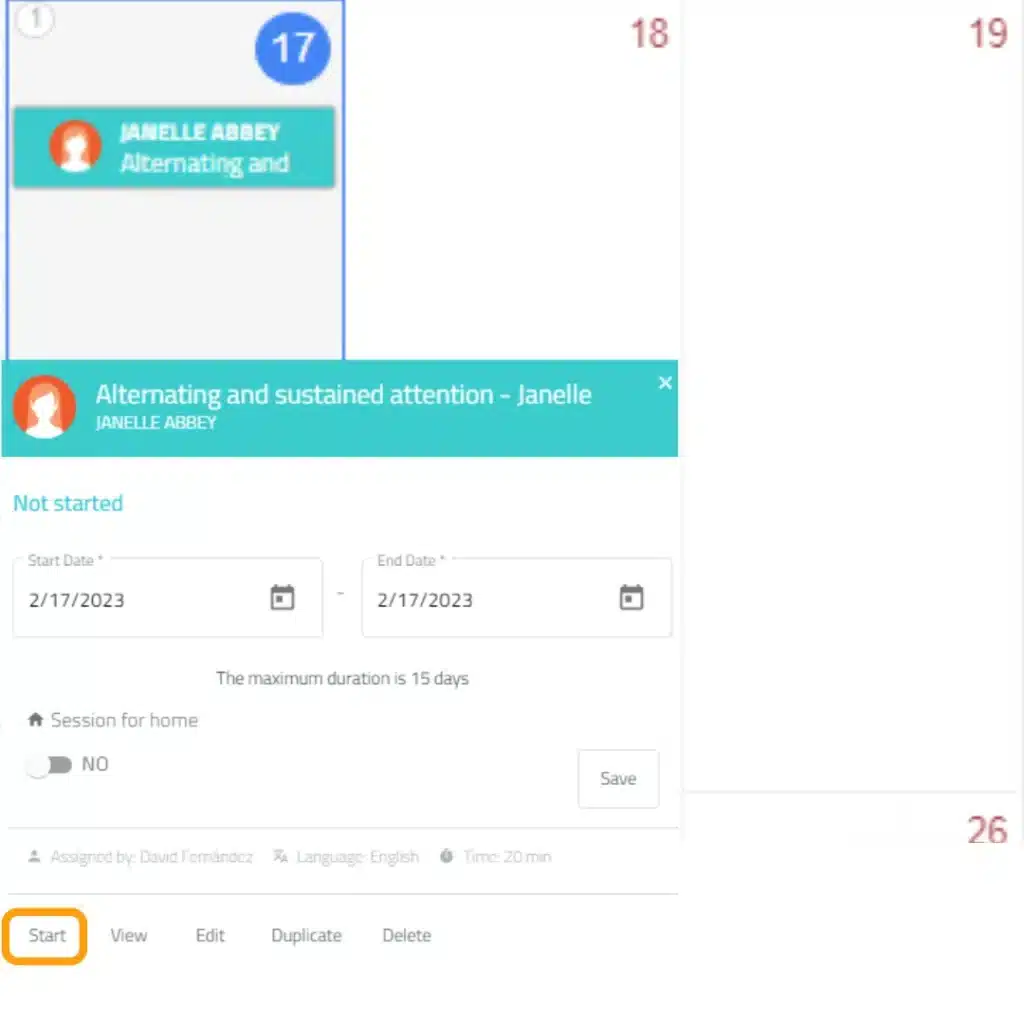
Click on “Start” to start your session.
You can perform this action without previously assigning it. In this case it will be automatically linked to the current day.
10. Follow the progress of the session
Once the session has started, you can follow its progress thanks to the appearance of a green indicator.

Calendar view and agenda view
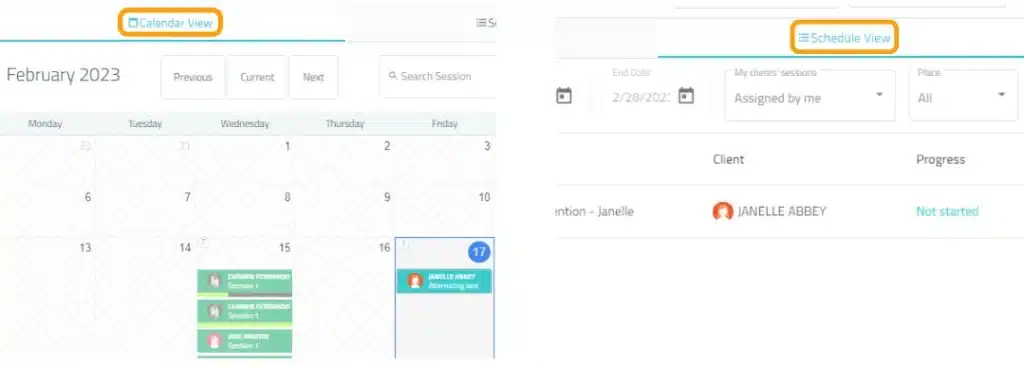
In addition, you can view and organize your sessions with the calendar view (left) or the agenda view (right).
