Do you have trouble keeping your users motivated? Does it take you hours to create stimulating activities for each of them? In this article we detail the advantages of personalizing activities and explain step by step how to create personalized activities with NeuronUP.
What is a personalized activity?
A personalized activity is an activity that is modified to suit the needs, cognitive level, and preferences of each user to facilitate the introduction of meaningful stimuli.
Which NeuronUP activities can be personalized?
You can personalize both generators and games in NeuronUP. If you don’t know the difference between these types of activities, we recommend that you take a look at this blog post.
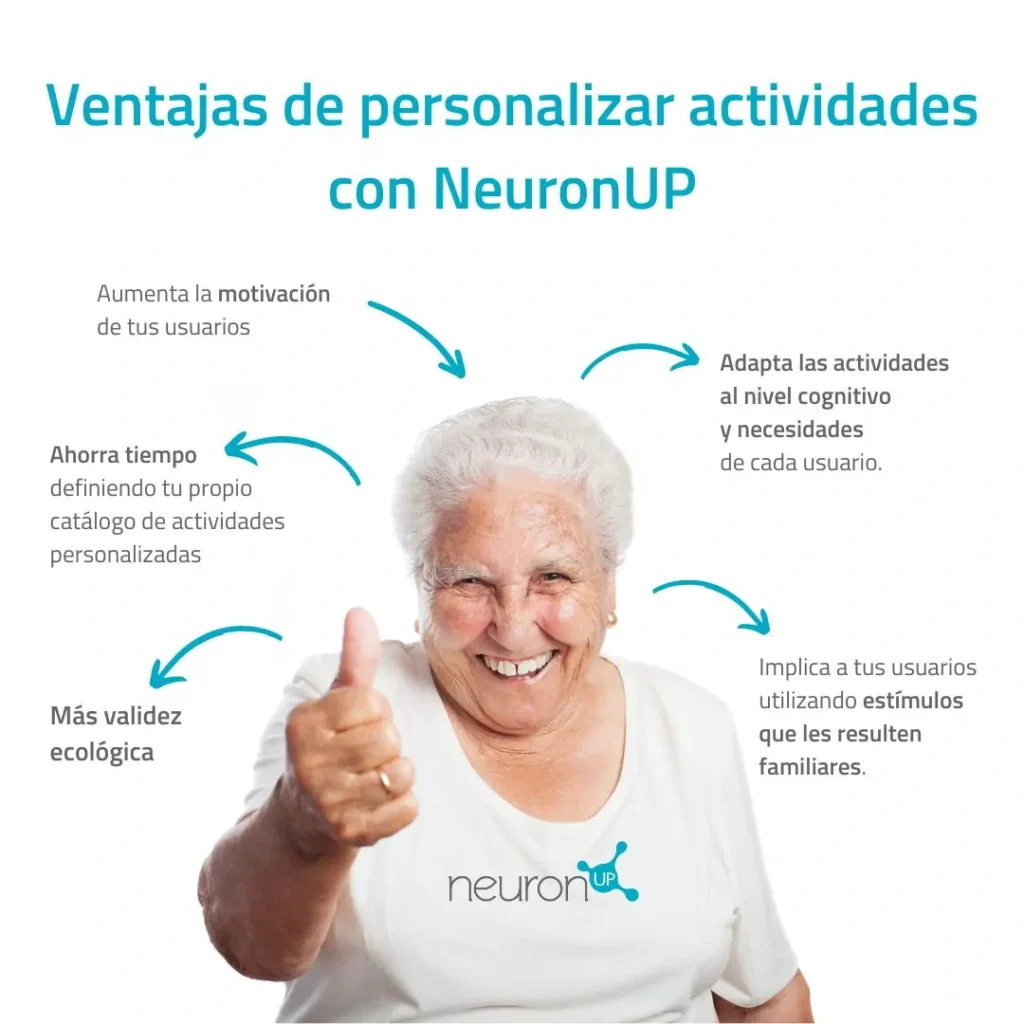
Advantages of personalizing activities with NeuronUP
- Increases your users’ motivation.
- Adapts the parameters of games and generators to the cognitive level and needs of all your users.
- Engages your users by using stimuli that are familiar to them.
- Greater ecological validity, that is, a better match between improvements in the skills trained in the clinic and their relationship with better performance in everyday activities.
- Saves time by defining your own catalog of personalized activities to reuse whenever you need. In just five minutes you can create endless, fully personalized activities from the same exercise.
How is a NeuronUP activity personalized?
Below, we explain how to personalize a NeuronUP game or generator:
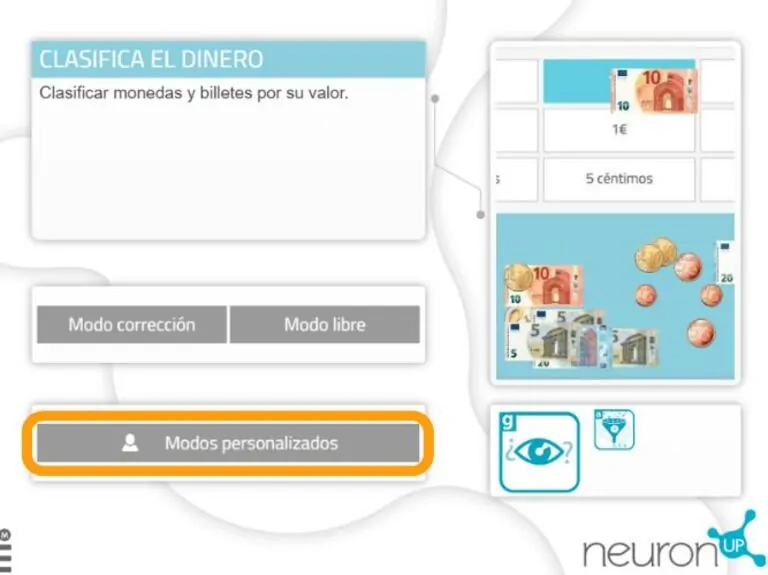
1. Choose and open an activity (generator or game)
Choose a generator from the NeuronUP homepage. Once the activity is open, select “Custom modes” in generators, or “Custom phases” in games.
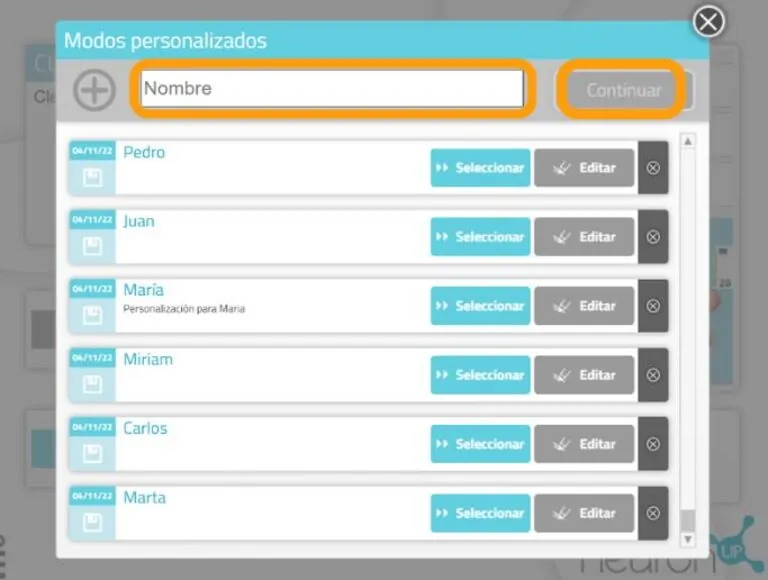
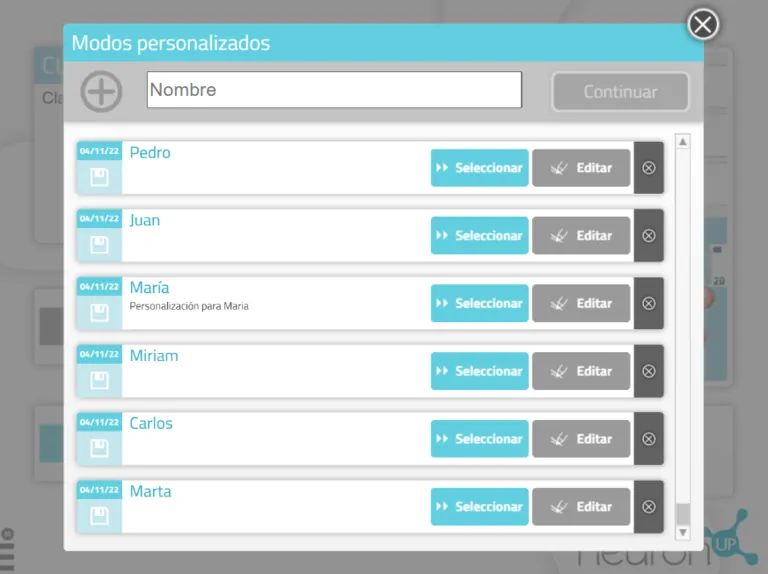
2. Create a customization
To create a new customization, enter a name for the customization. For example, the name of the user for whom it will be used. Then click “Continue“.
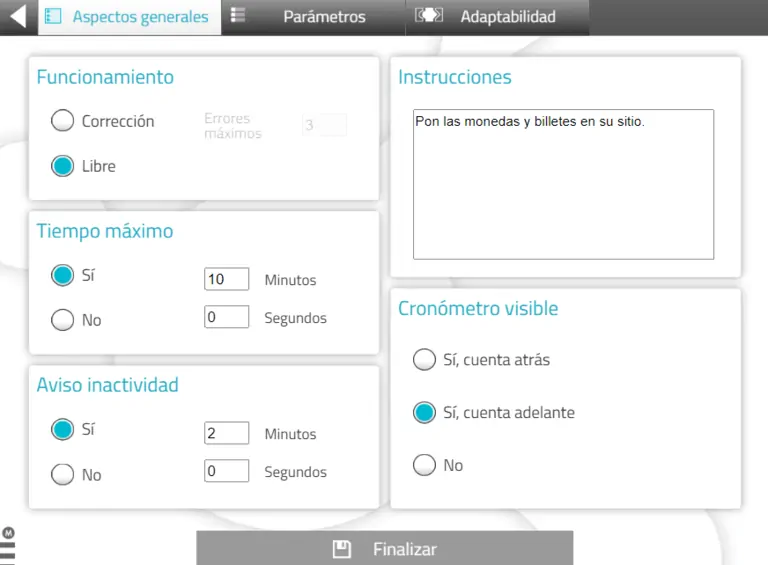
3. Start personalizing
When personalizing an activity you can edit the general aspects, the parameters and, in some exercises, the adaptability. Below, we explain each of them:
3.1. General settings
They are the same for all generators. You will be able to choose the working mode, adjust the time, notify the user when they are inactive, adapt the activity instructions, and add a timer.
3.2. Parameters
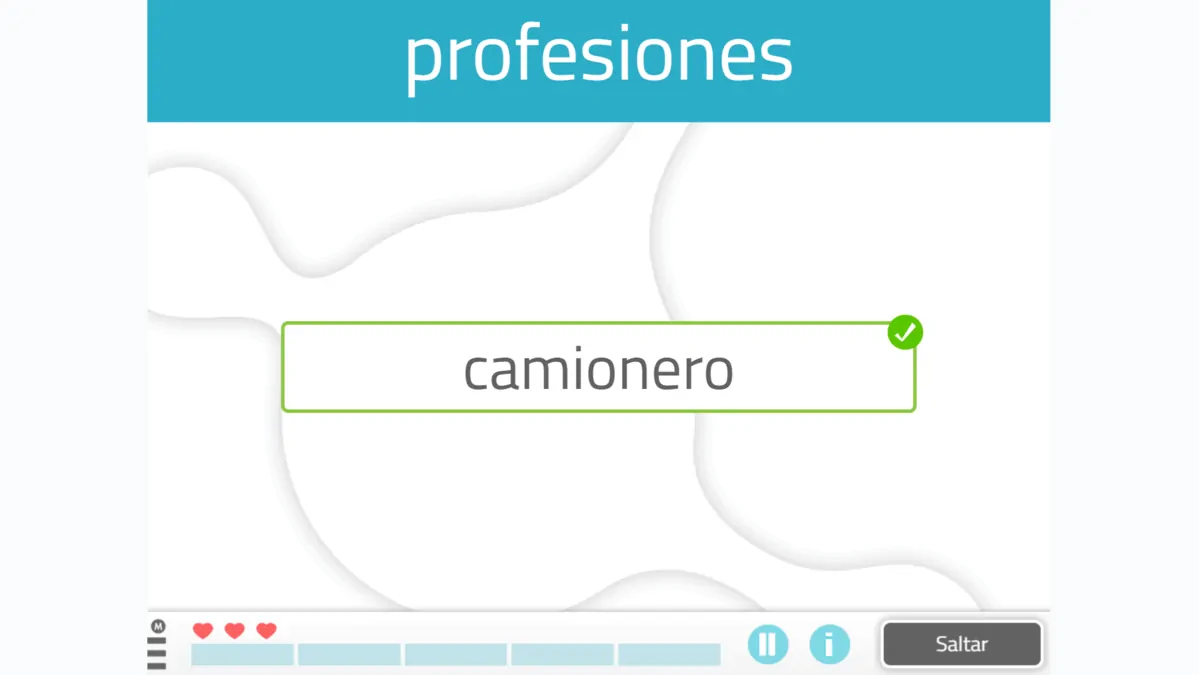
They are specific to each activity. In this case, we are in a money-handling activity, so you can choose the type of currency, the number of bills/coins, and their value.
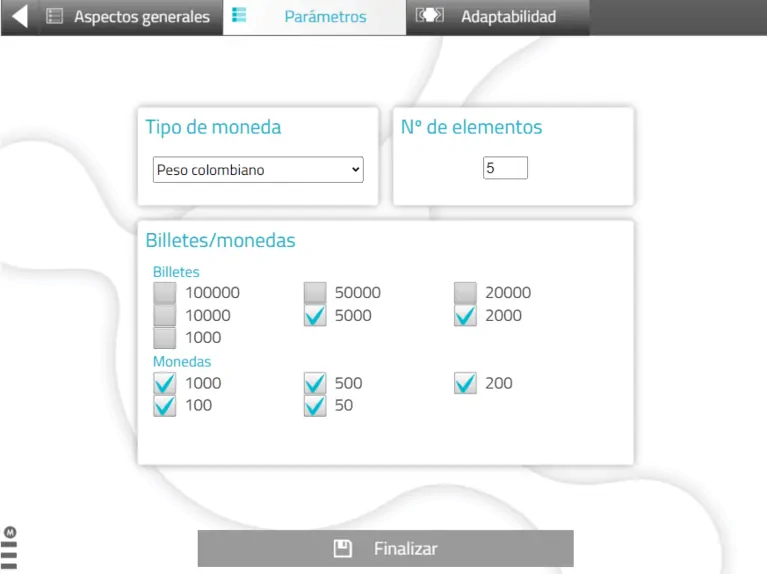
3.1. Adaptability
Allows you to choose between dragging or tapping the elements to make the task easier for users with motor difficulties or who are not comfortable with the mouse or touchscreens. It is not available in all activities.

4. Save the customization
You can add a description to the customization. This way, you can more easily remember its characteristics. To save the customization, click “Add“.

5. The personalized activity is ready and saved
You can work directly with the personalized activity.
When you want to work with it later, you will find it in the activity’s list of customizations.
How to add a personalized activity to a session?
Personalized activities can also be added to NeuronUP sessions, both face-to-face and home sessions. To do so:
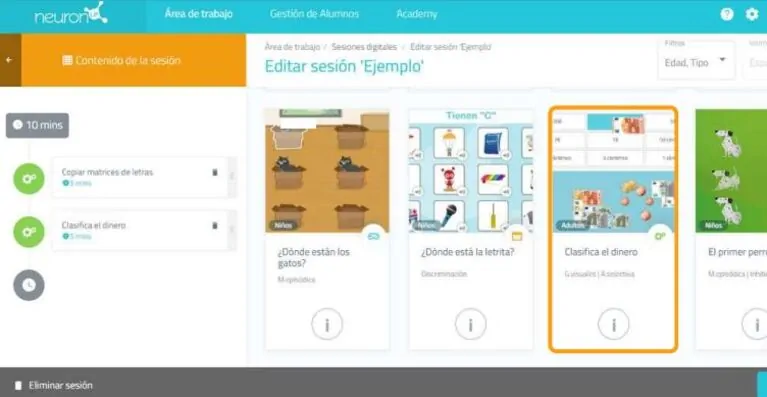
1. Go to “Sessions”, then click on “Digital sessions” and click “New digital session“.
2. Configure your session and add activities by clicking on them.
3. Choose the activity for which you created a customization. In this case Sort the money.
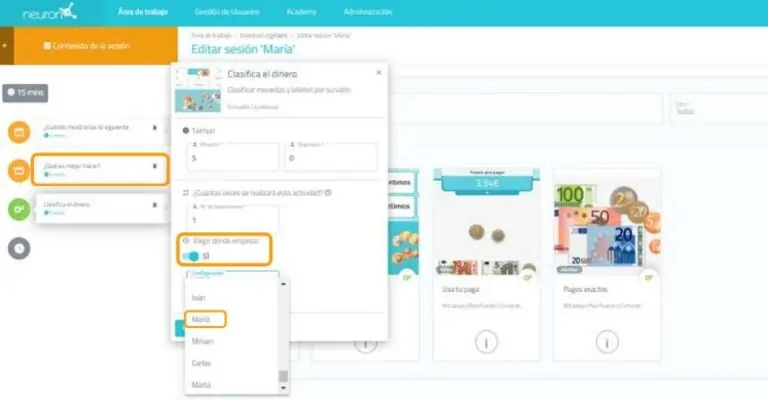
4. Once the activity is added, click on it on the left side of the screen,
as shown in the image below.
5. Next, enable the “Choose where to start” filter and you will see the different
customizations you have created for this activity.
6. Choose the configuration you want. In this example we choose “María”. This
way, your user will perform their session with the personalized activity.
If you liked this post about personalized activities, you may also be interested in the following information:

“This article has been translated. Link to the original article in Spanish:”
Personalizar actividades con NeuronUP


Leave a Reply