Do you find it hard to keep your patients motivated, or do you spend hours creating stimulating activities for each of them? In this article we detail the advantages of personalising activities and explain step by step how to create personalised activities with NeuronUP.
What is a personalised activity?
A personalised activity is an activity that is modified to adapt it to the needs, cognitive level and preferences of each patient to facilitate the introduction of meaningful stimuli.
Which NeuronUP activities can be customised?
Both NeuronUP generators and games can be customised. If you don’t know the difference between these types of activities, we recommend you take a look at this article.
Advantages of customising activities with NeuronUP
- Increase the motivation of your patients.
- Adapt the parameters of games and generators to the cognitive level and needs of all your patients.
- Involve your patients using stimuli that are familiar to them.
- More ecological validity, i.e. greater concordance between the improvement of the skills trained in consultation and their relationship with a better performance of day-to-day activities.
- Save time by defining your own catalogue of personalised activities to reuse whenever you need them. In just five minutes you can create infinite and totally personalised activities from the same exercise.
How to customise a NeuronUP activity?
Here’s how to customise a NeuronUP game or generator:
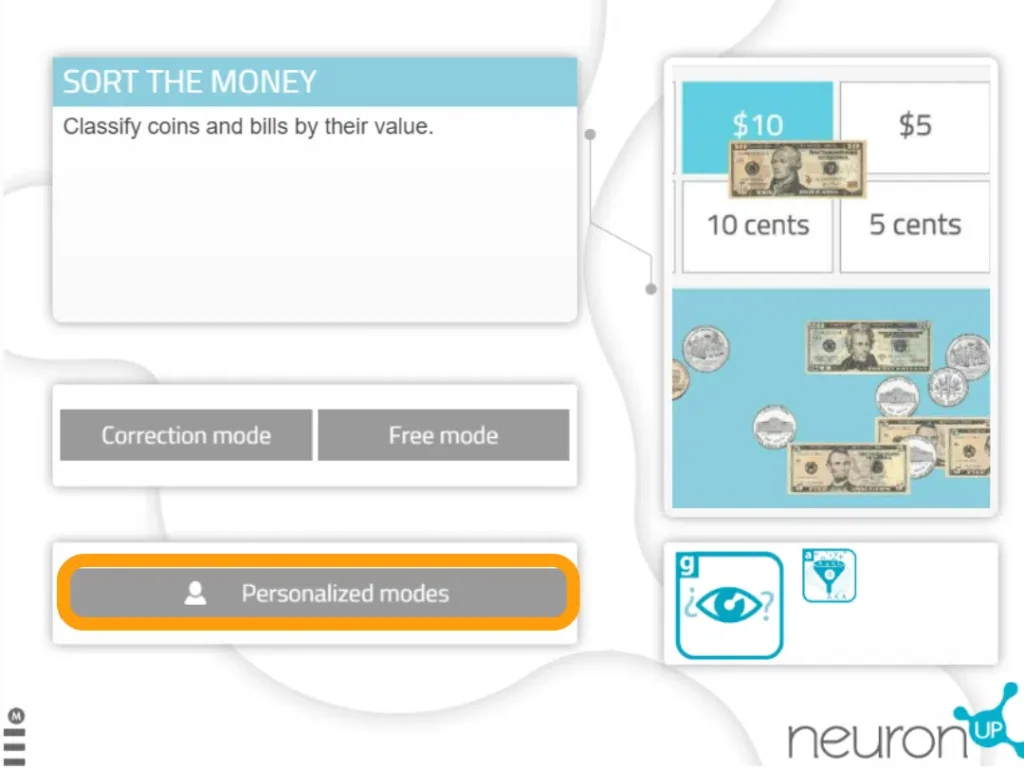
1. Choose and open an activity (generator or game)
Choose a generator from the NeuronUP homepage. Once the activity is open, select “Custom Modes” for generators or “Custom Phases” for games.
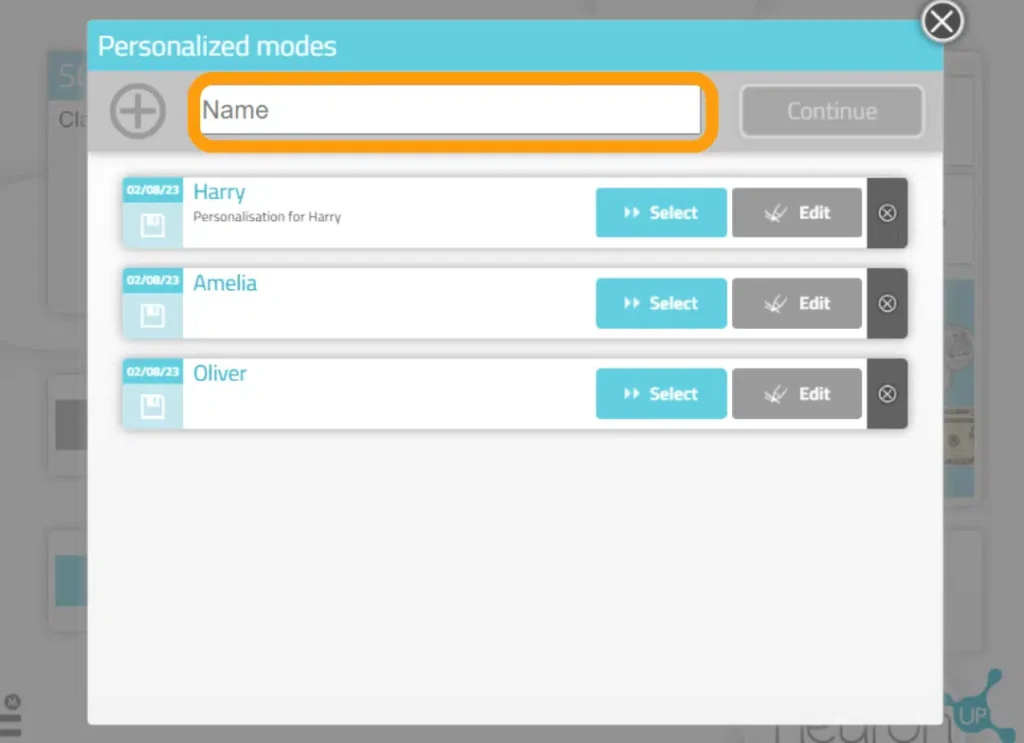
2. Create a personalisation
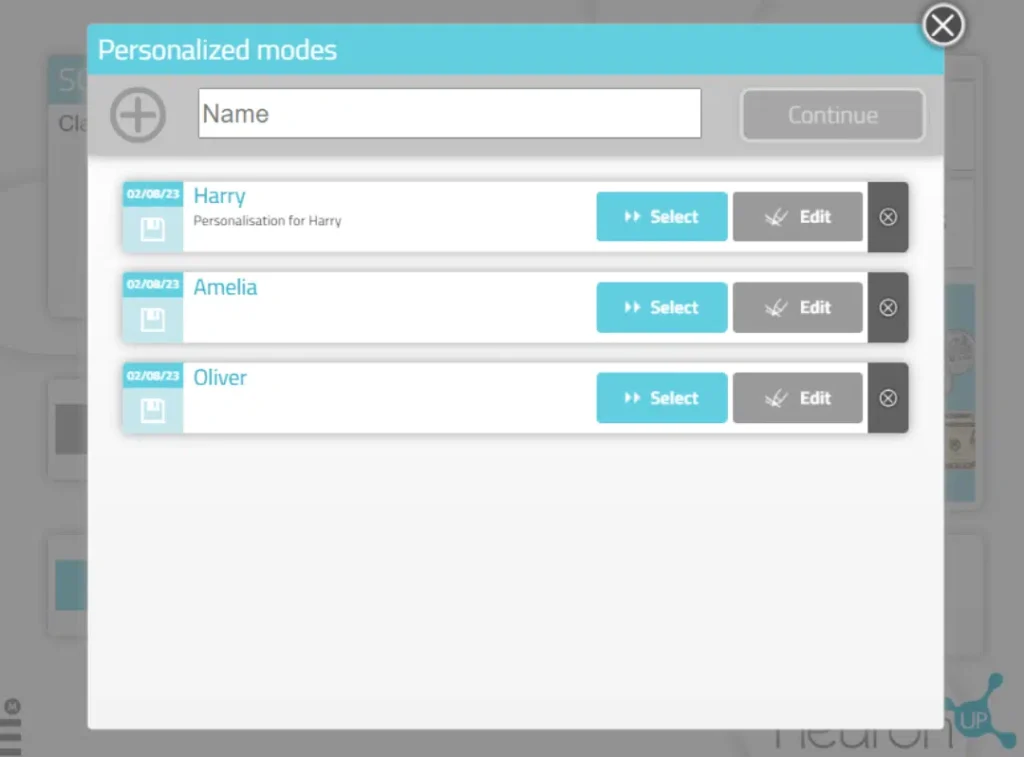
To create a new personalisation, enter a name for the personalisation. For example, the name of the patient it will be used for. Then click on “Continue”.
3. Start customising
When customising an activity you can edit the general aspects, the parameters and, in some exercises, the adaptability. Below, we explain each of them
3.1. General aspects
They are the same for all generators. You can choose the working mode, adapt the time, warn the patient when inactive, adapt the activity instructions and add a timer.
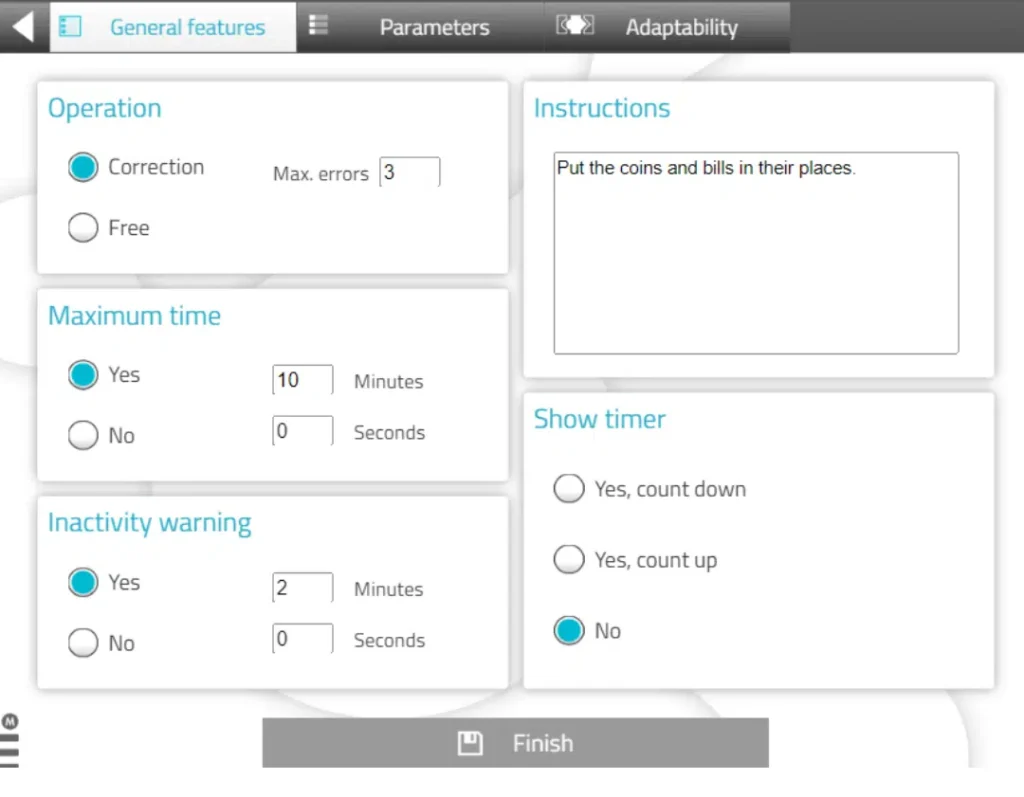
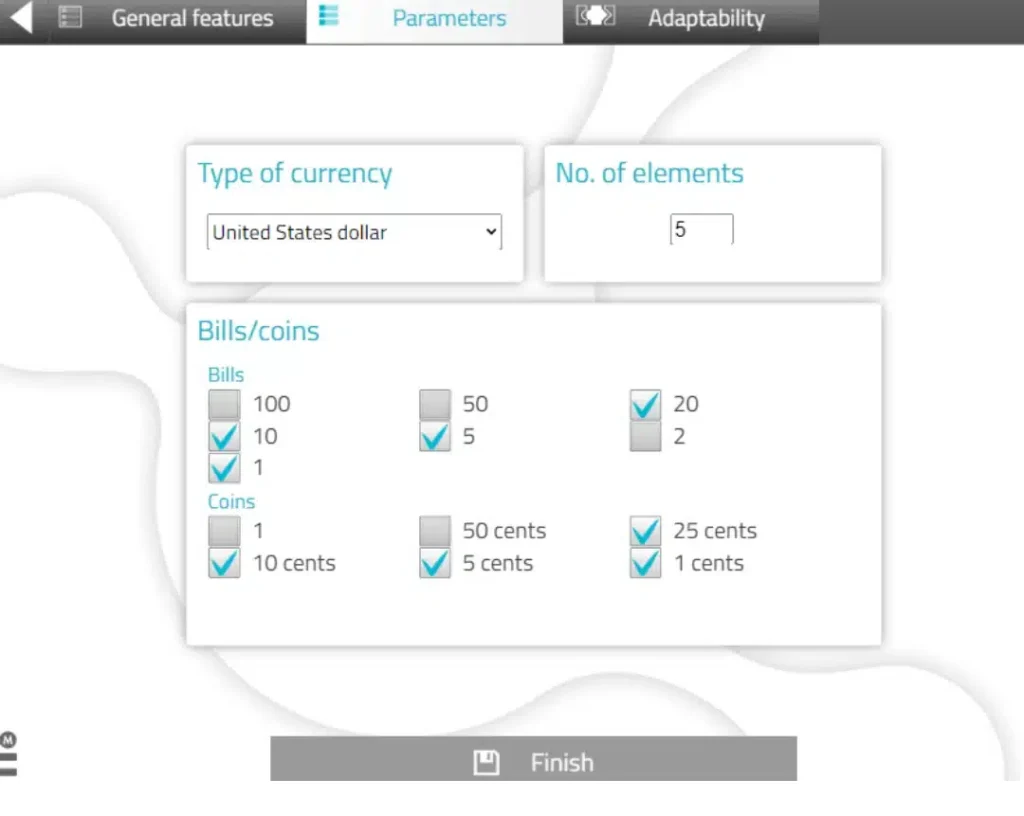
3.2. Parameters
They are specific to each activity. In this case, we are in a money handling activity, so you can choose the type of currency, the amount of banknotes/coins and their value
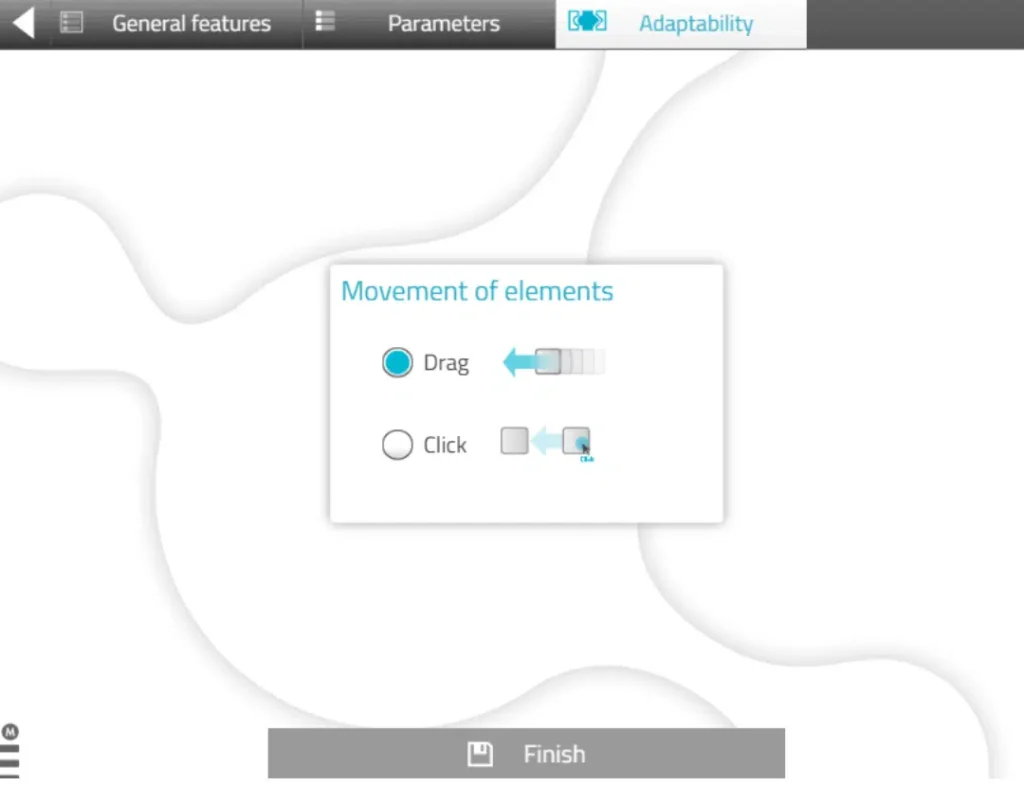
3.3. Adaptability
Allows a choice between dragging or clicking on elements to make it easier for patients with motor impairments or those who are not good with a mouse or touch screens. Not available for all activities.
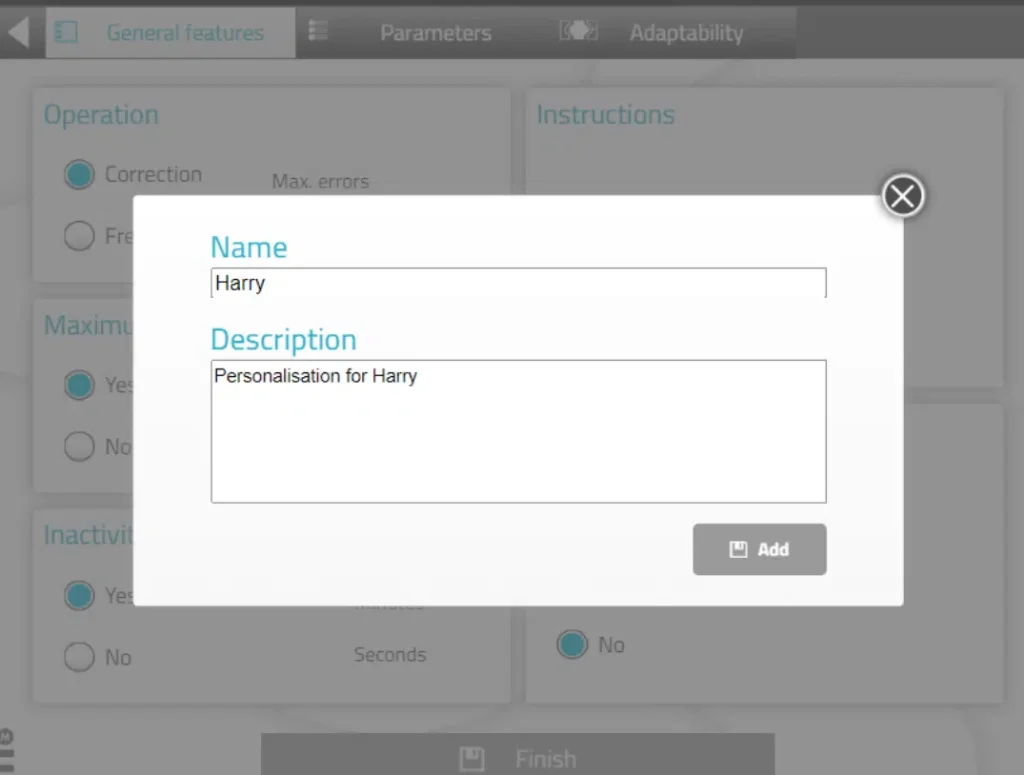
4. Save personalisation
You can add a description to the personalisation. This will make it easier for you to remember its characteristics. To save the personalisation, click on “Add”.
5. The personalised activity is ready and saved
You can work directly with the personalised activity.
When you want to work with it later, you will find it in the list of activity customisations.
How to add a customised activity to a session?
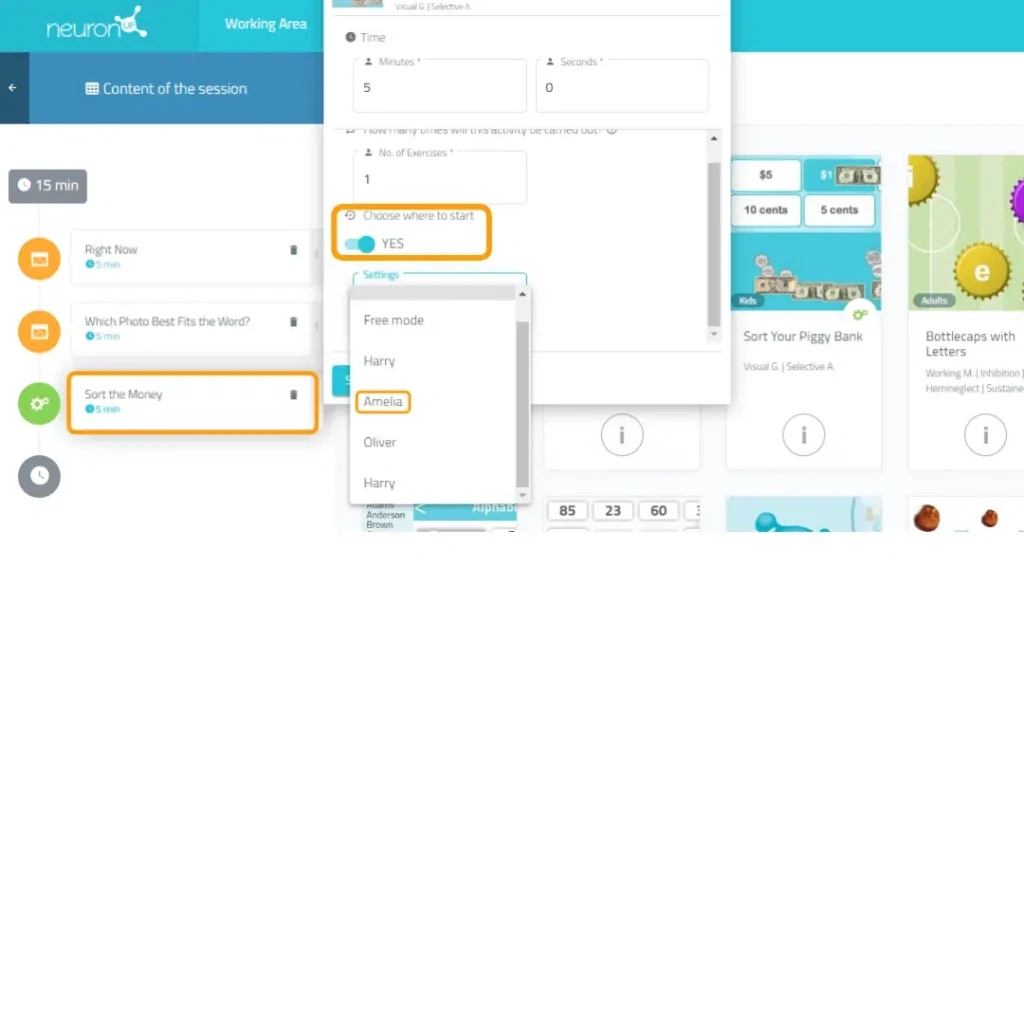
Personalised activities can also be added to the NeuronUP sessions, both face-to-face and home sessions. To do this:
1. Go to “Sessions”, then click on “Digital sessions” and click on “New digital session“.
2. Set up your session and add the activities by clicking on them.
3. Choose the activity for which you have created a personalisation. In this case Sort money.
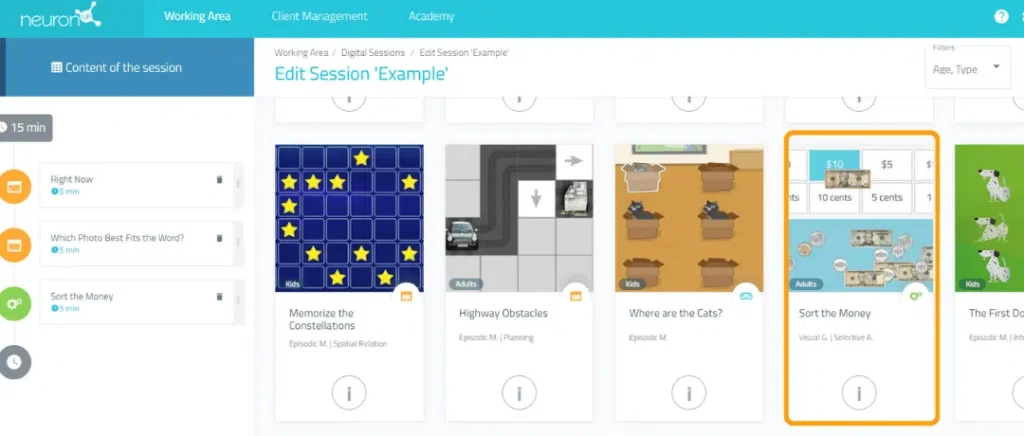
4. Once you have added the activity, click on it on the left side of the screen,
as in the following image.
5. Next, activate the filter “Choose where to start” and you will see the different
customisations you have created for this activity.
6. Choose the configuration you want. In this example we chose “Mary”. This way, your
your patient will log in with the personalised activity.
